Instructions to use Synology NAS
- Author:
Vinay K L
- Copyright:
None
- Date:
07/10/2022
Purpose
To use Synology NAS system to store and access research data.
Ask Robin VV if you don’t have an account *
Accessing the device through IP
Steps
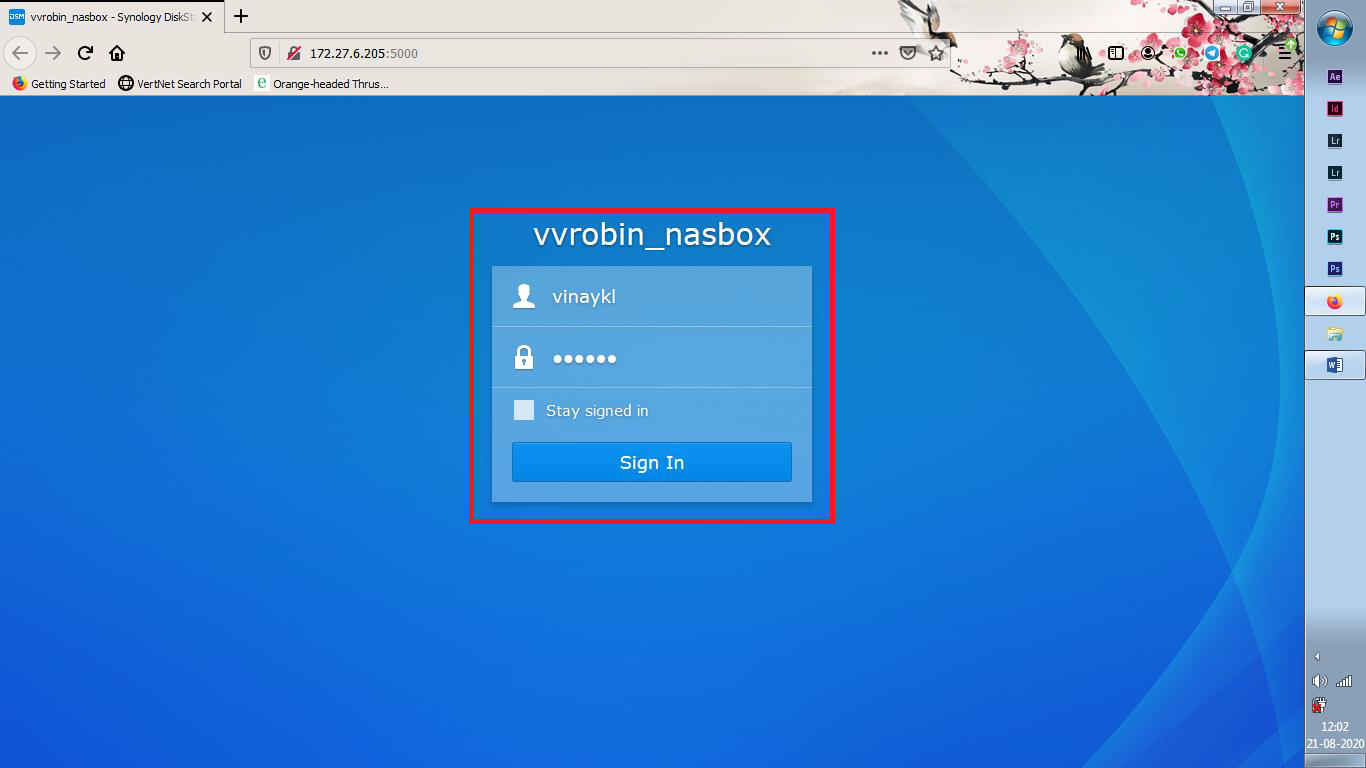
- Go-to your desired browser and type 172.27.6.205 (Please note that you can access ONLY if you are in the institute network)

- Enter the credentials given to you in the following window and sign in.
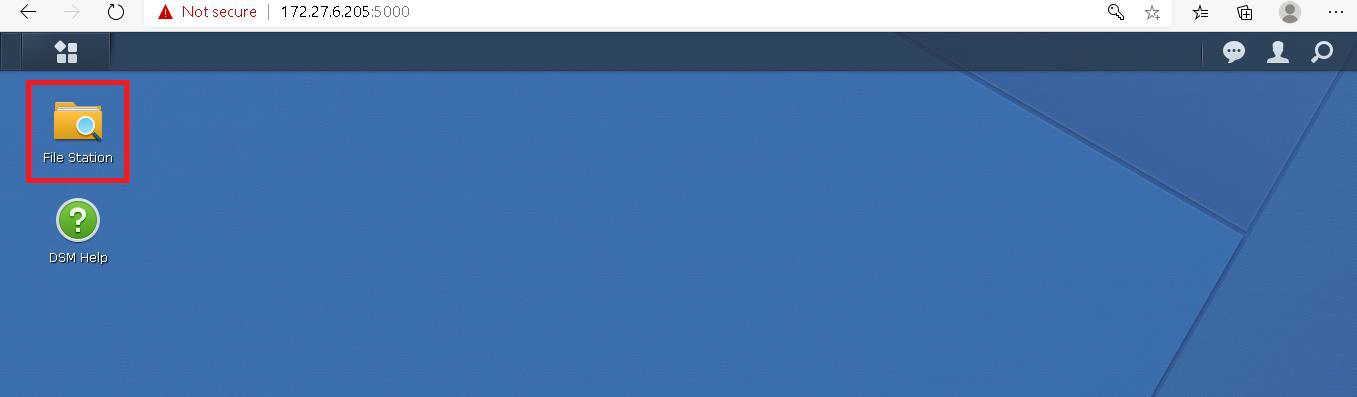
- By default, it will take you to root folder for which your account has access only.
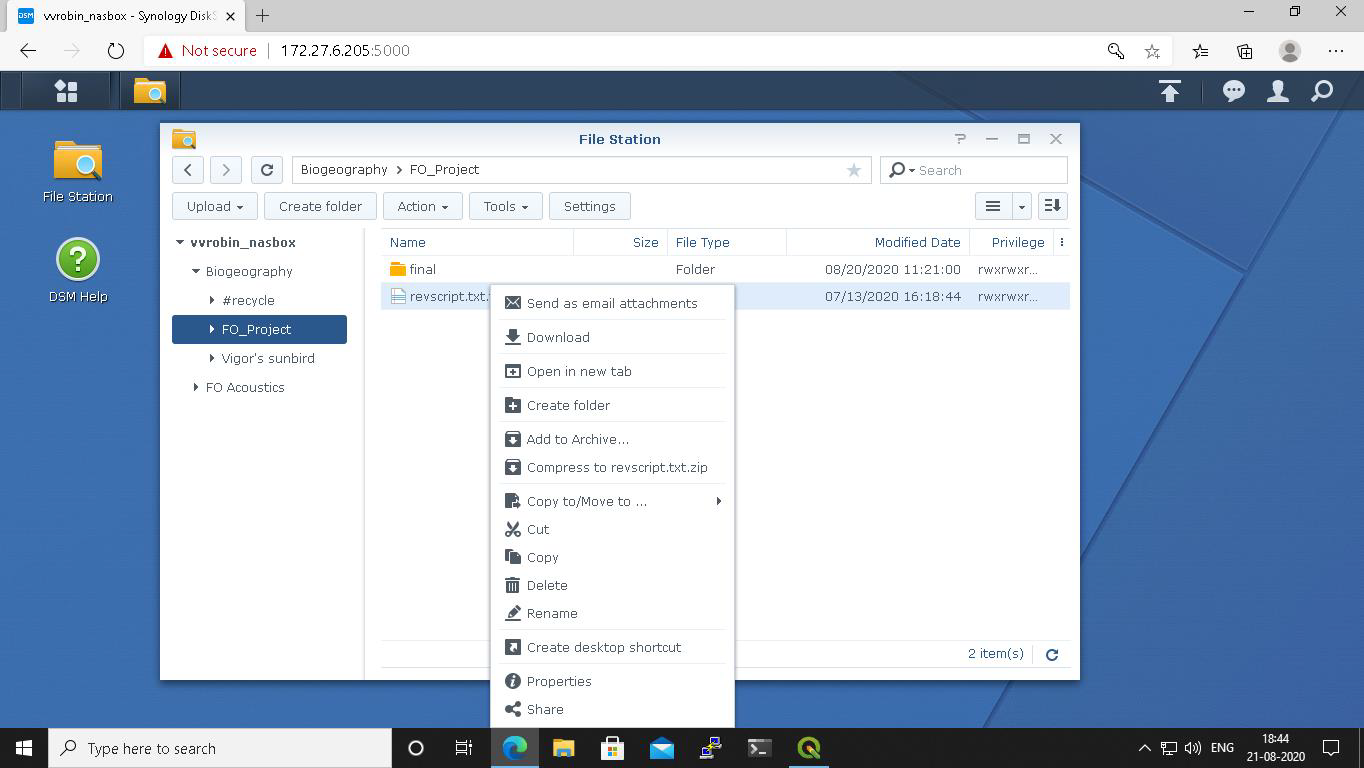
- To upload files, use the option upload (either Upload skip or Upload Overwrite)

- Right Click on the file/folder for more options such as Download back to computer/Delete from the Synology Disk station etc.
- Logout once you done with your work.

Mounting NAS to the system(s) connected to institute network (Use this only if you want to run any analysis directly from the Synology)
Steps
- Launch/Start the Synology Assistant from the Desktop
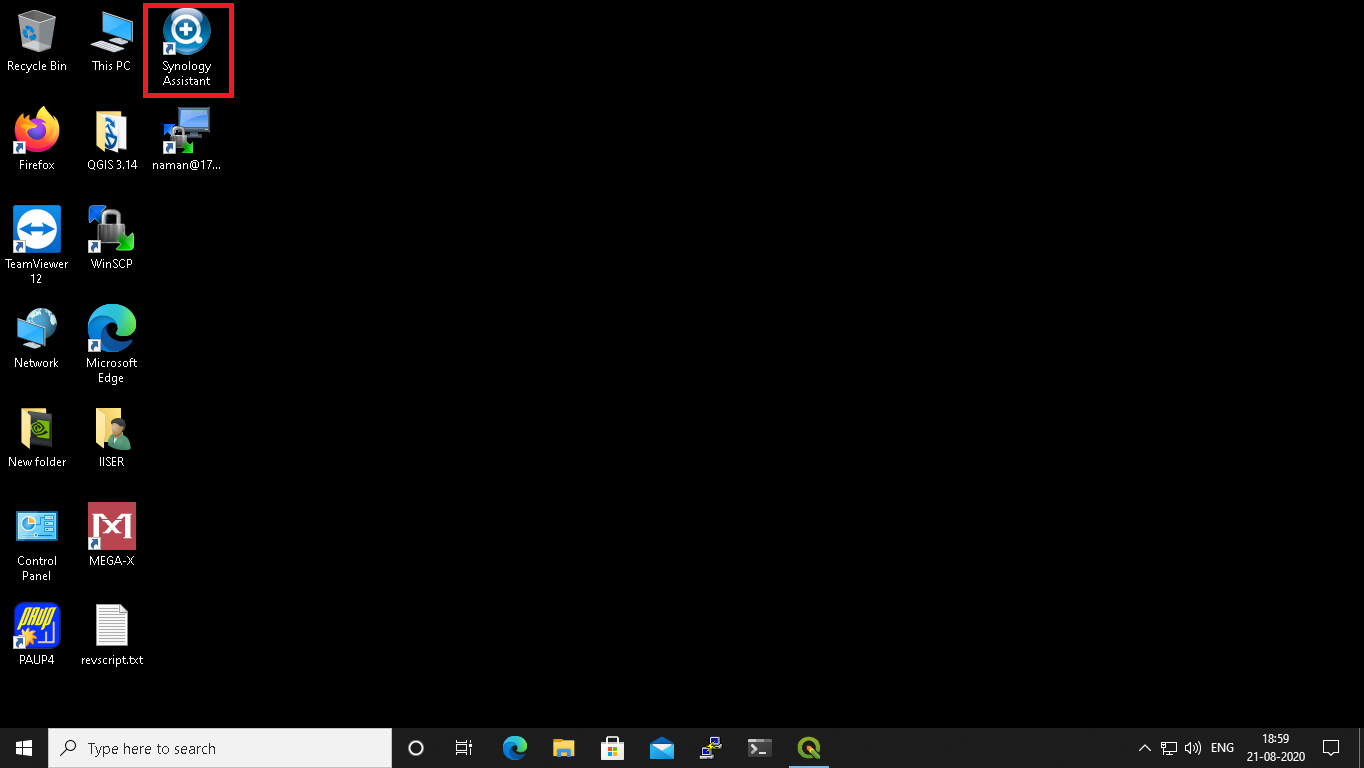
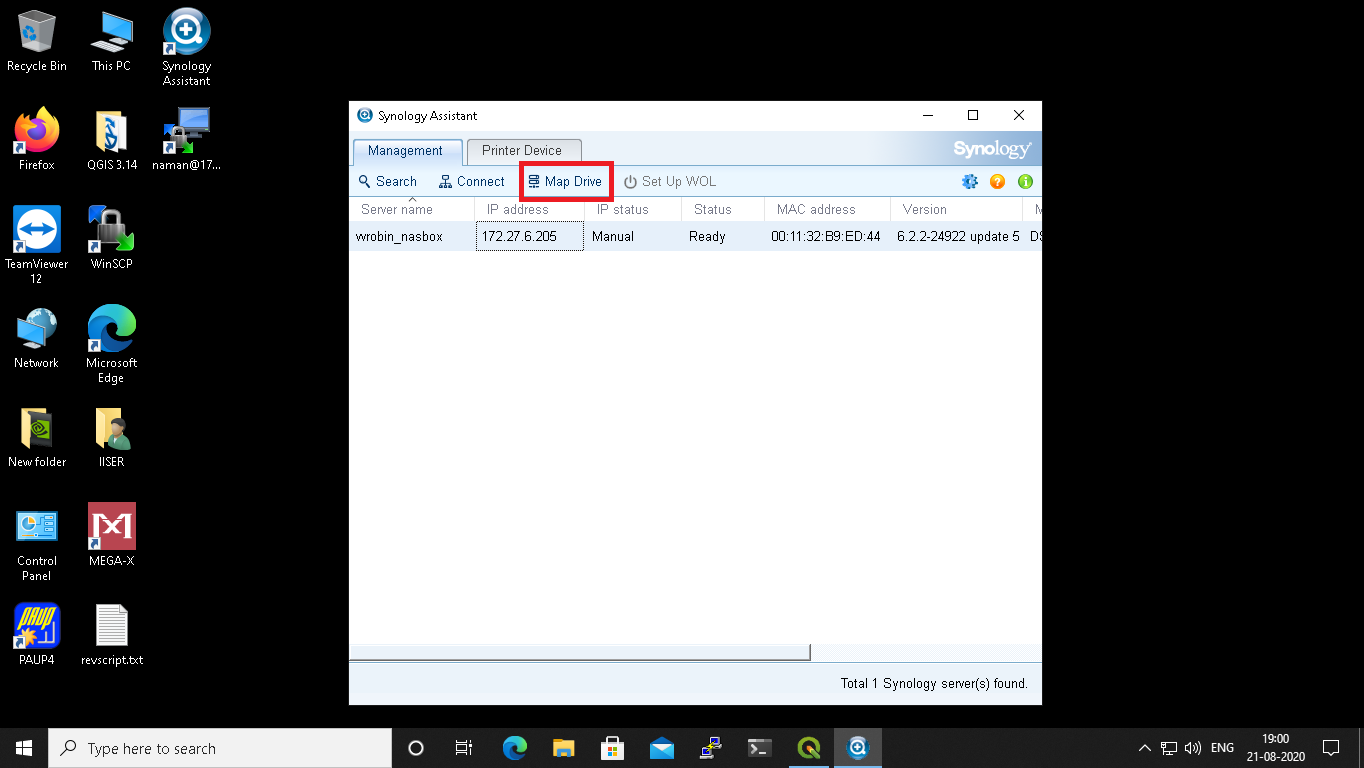
- It will automatically search for the available Synology device on the network and show up the vvrobin_nasbox then click Map drive.
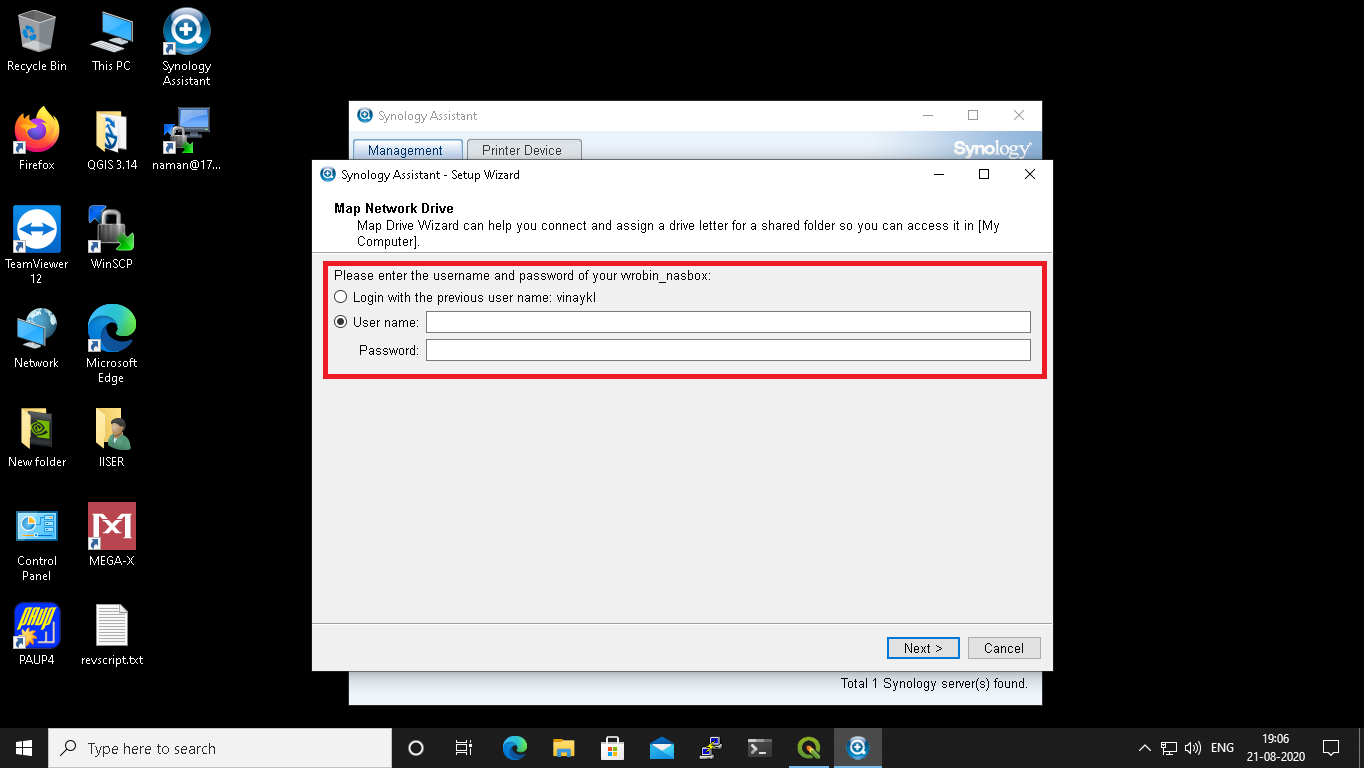
- Enter your NAS login credentials and click next
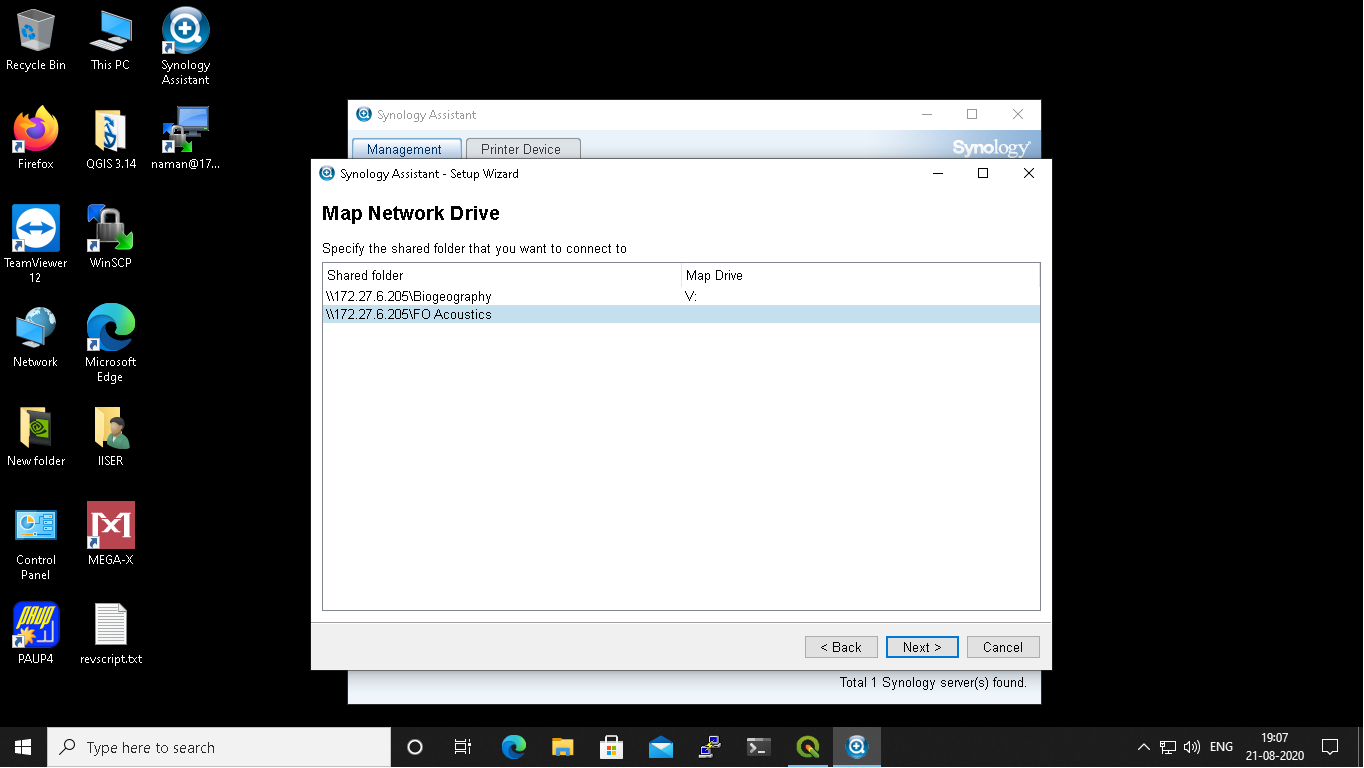
- Select the folder which you want to mount on the machine and click next.
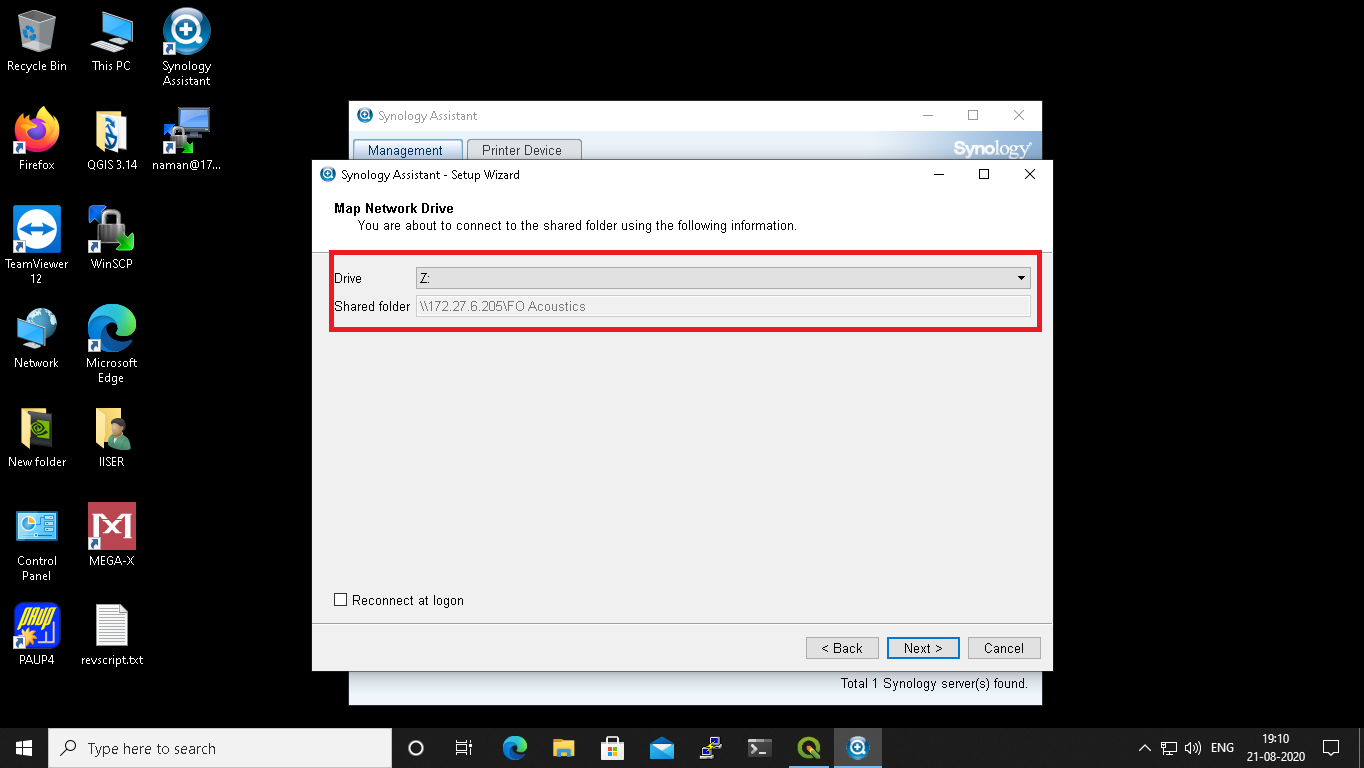
- Machine will automatically suggest a drive path, select that and click next and finish.
- That is it. It will show up in My Computer as a virtual drive, from where you can copy/paste/delete/directly use the data stored in the Synology NAS.
